Screaming Frog is a tool that sits within most SEO’s toolset due to how powerful it is and the multiple uses that it has.
Best known as an SEO spider, Screaming Frog allows you to crawl a website and pull valuable data in bulk, such as; metadata, headings, response codes, canonicals and much more. However, the tool is much more powerful than some people realise and can help you perform tedious tasks in almost no time at all.
So in this blog post, I’ll be covering one of those aspects and talking about the custom extraction function. More specifically, I’ll be covering how you can use this function to scrape data from a website in no time at all.
What is custom extraction?
Firstly, we should cover what custom extraction is. This is one of the hidden gems within Screaming Frog that allows you to pull custom information from a website or subset of pages.
This is done through using one of the following;
CSSPath
XPath
Regex
Using these, you can select certain criteria of a webpage and display the text, inner HTML, HTML element or function value that is help within your selectors.
For the purpose of this blog post, we will be using XPath as our chosen mode.
Why would I use custom extraction?
There are many situations where you may want to use custom extraction to scrape data from a website such as; pulling text displayed in buttons across a website, pull featured snippet information from search results or pull in rating reviews for products/listings.
In this example, to keep it fairly simple and as an introduction, we’re going to be using custom extraction to pull a list of all blog post titles from the Screaming Frog blog.
To put this into a real-world example, you may do this to a competitors website to try and identify the types of topics and niches they are creating blog posts for or on a larger blogging website to try and find similar topics that get covered.
Identifying the XPath selector
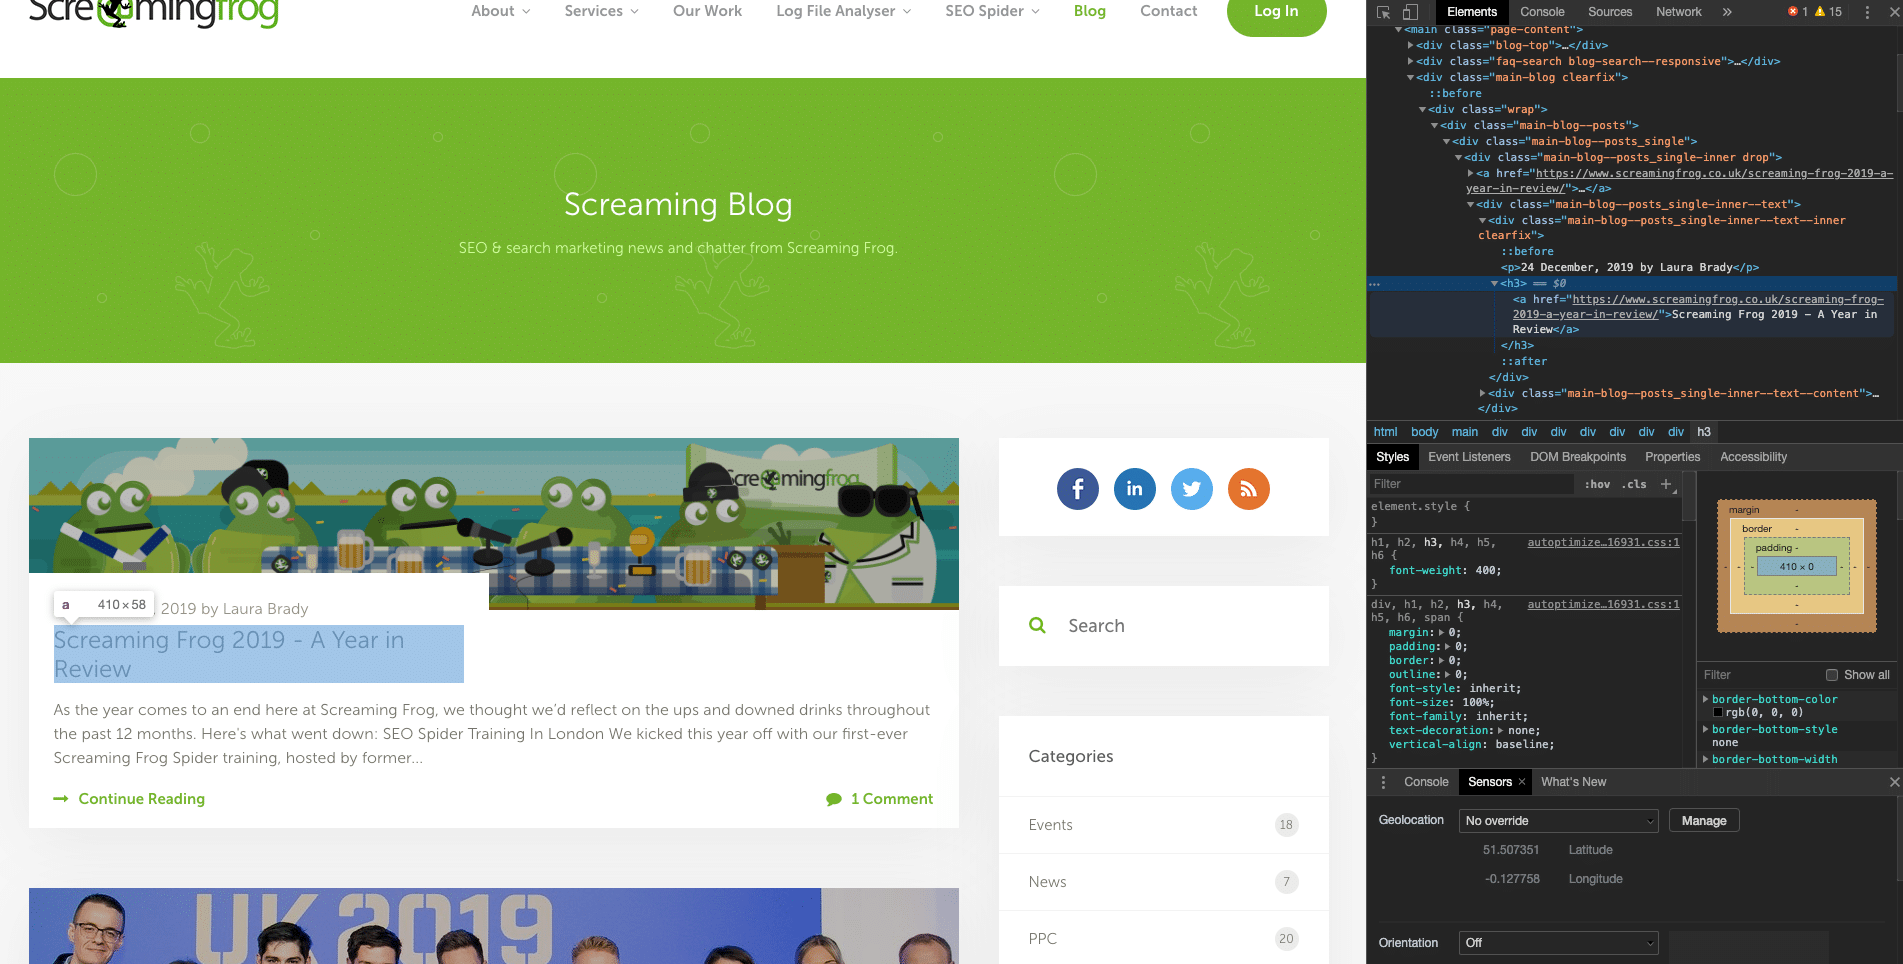
First things first, navigate to a page that will display the information you’re looking to scrape. So in this example, it’s the Screaming Frog blog homepage. Once there you need to inspect the element that you are looking to scrape using the inspect tool on your browser.
Now it’s time to select the XPath for that specific element. In our case, we have ensured that the blog title is selected for inspection. Whilst it may seem like finding the XPath could be a tedious task, it couldn’t be any easier, if we right-click on the element and go down to the ‘copy’ option, we find an option that allows us to copy XPath. Simple.
Setting up your custom extraction
Now for the fun part - setting up the custom extraction setting in Screaming Frog. Once you have Screaming Frog loaded up, select ‘configuration from the menu, go to custom and click on extraction. You will see the following box pop up.
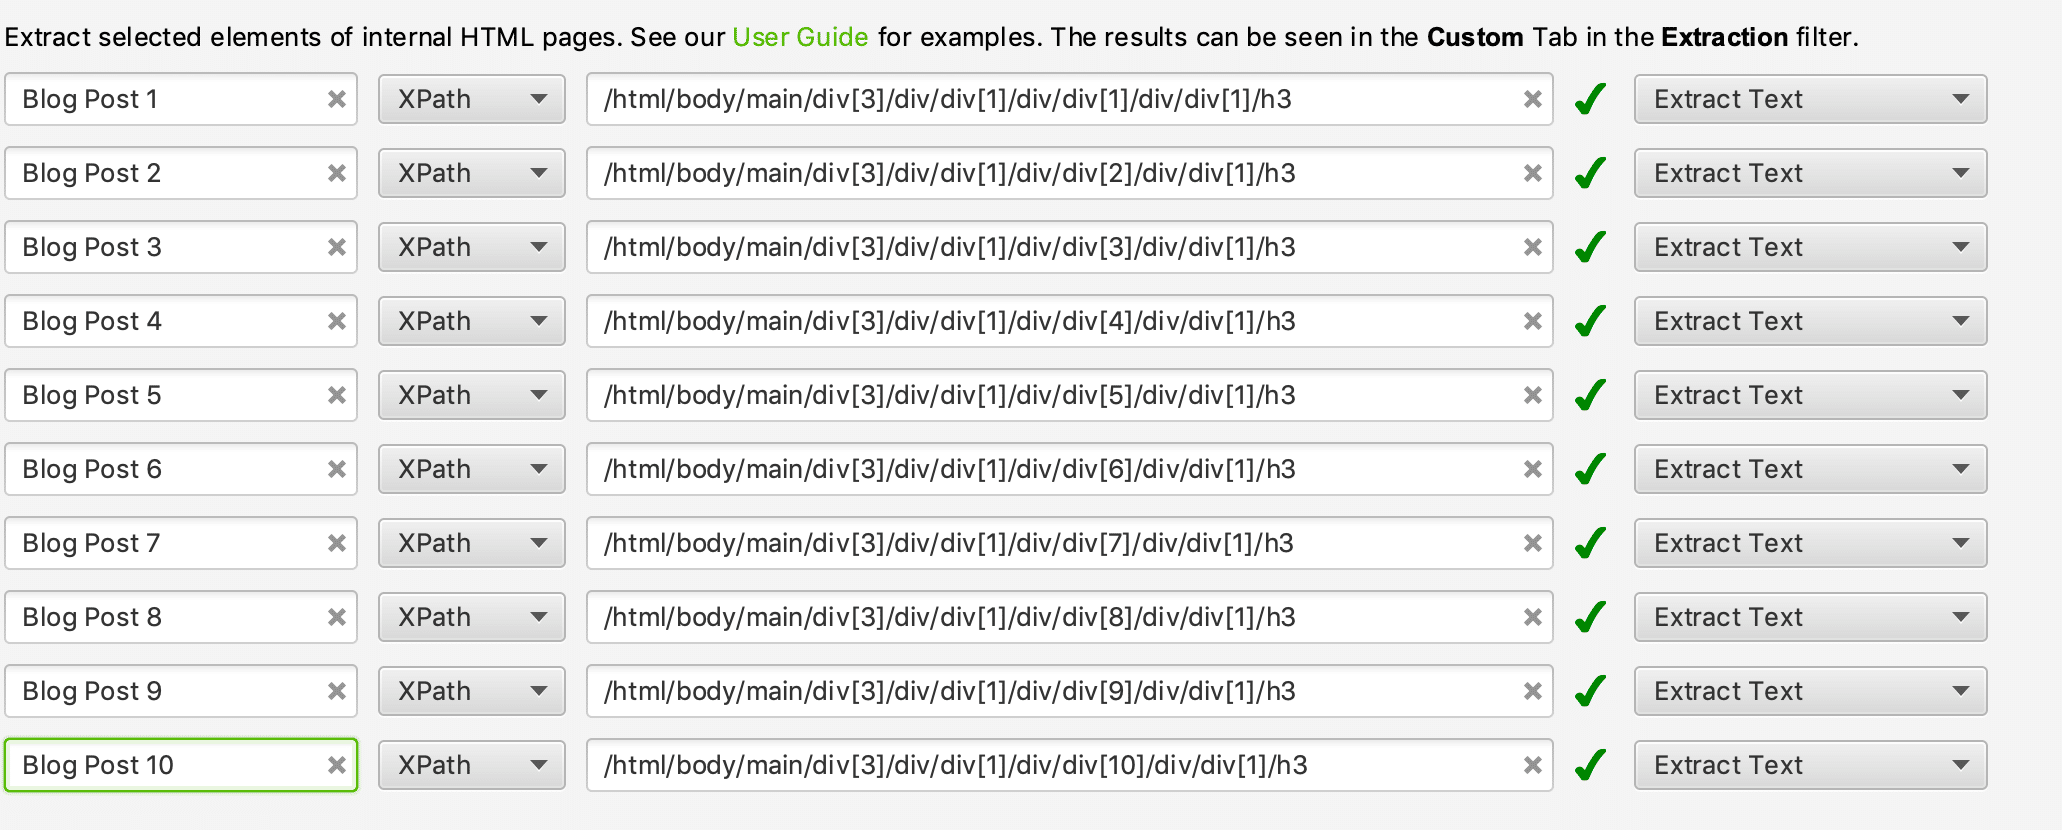
Select the drop-down on ‘Extractor 1’ and select XPath. Once you do this, you will see a new section appear that lets you fill in the XPath selector and also be able to update the name of the extractor. Paste in the XPath selector you have just copied from your website and rename the extractor to whatever suits you best. In this example, we will be calling it ‘Blog Post 1’.
Repeat this step as many times as necessary throughout the 10 available extractors, ensuring you update the name of each extractor and the XPath selector for each title. The reason you have to copy and paste each selector separately is that each element will vary slightly in XPath to help crawlers identify the differences between their positioning on the page.
Below is a screenshot of the extraction settings after completing the above steps.
Remember to select the correct data field to extract for each selector too, which in this case, is ‘Extract Text’.
Configuring your crawl
Now that we have the custom extraction settings ready to go, it’s time to configure the spider to make sure we crawl the correct pages. This can involve a fair bit of trial and error depending on the complexity of the data you’re extracting and the website you’re crawling.
For this example, we want to crawl every blog page that exists on the Screaming Frog website. Therefore, we need to make use of the ‘Include’ feature under the configuration menu. This setting allows us to set certain URLs or regex URLs that can be crawled. So in this instance, we will include the following setting;
This will ensure that once the crawl begins, the spider only crawls pages that have the above string within them and will not follow links to any other areas of the website.
Now for the fun part
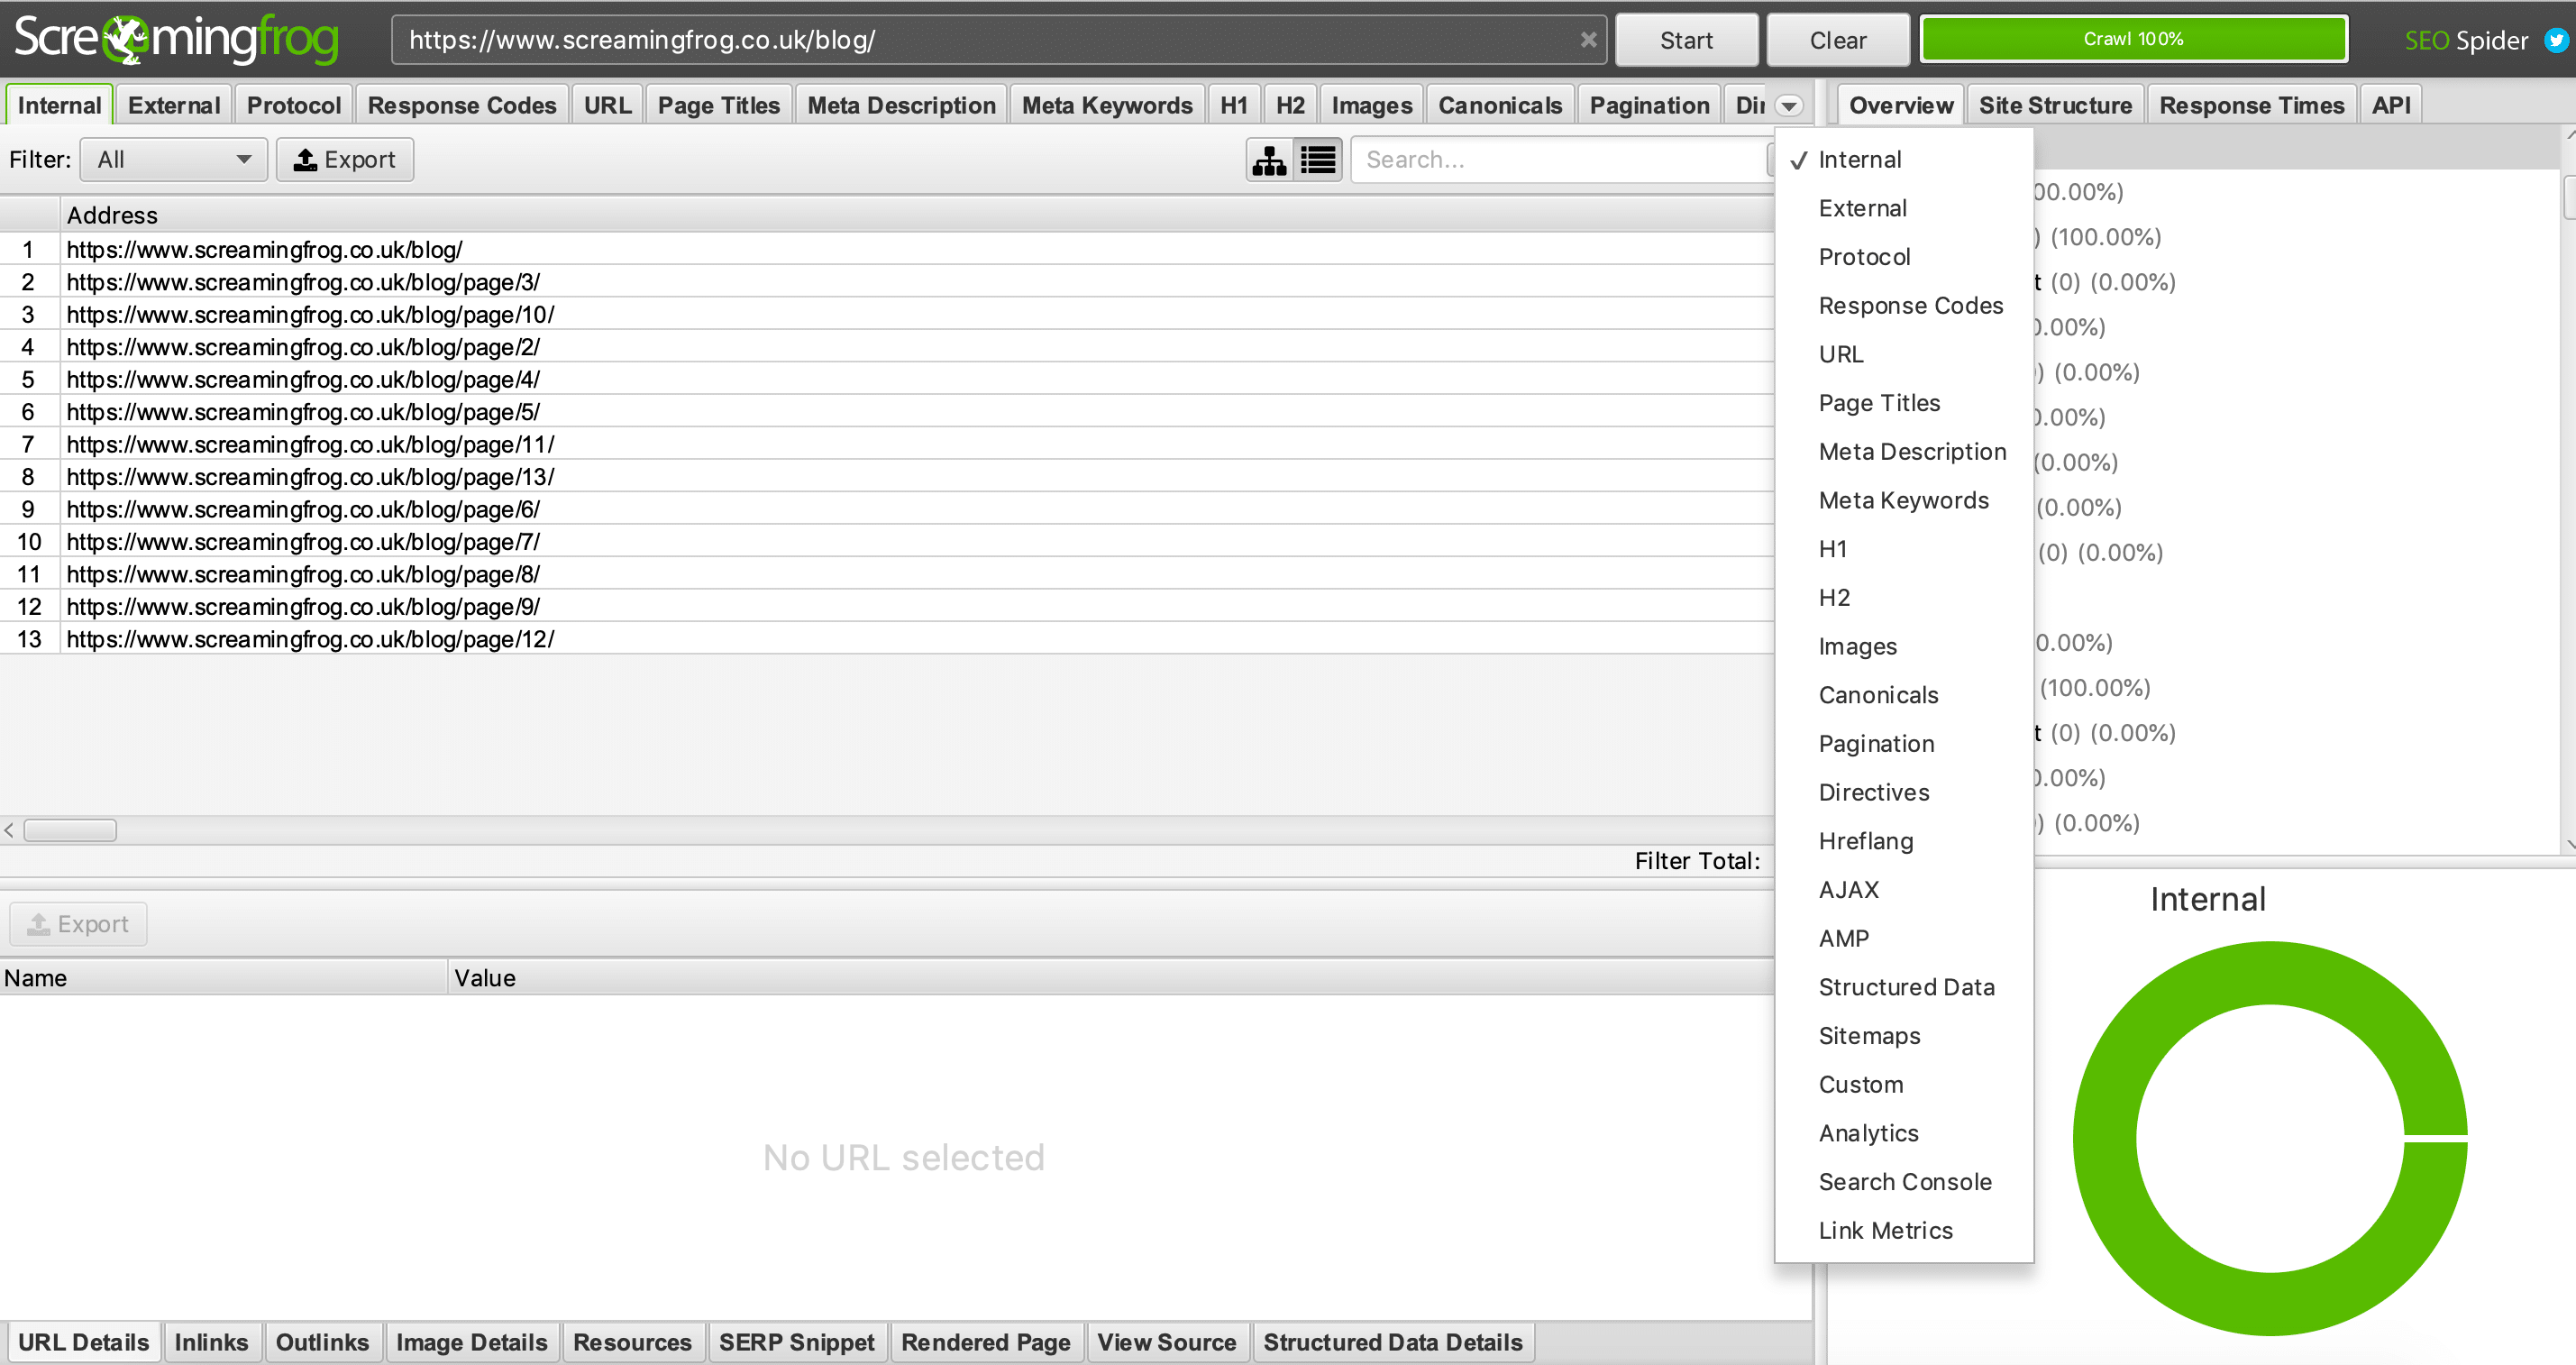
It’s now time to begin your crawl and start gathering the results. As with any other time you use Screaming Frog, you will need to enter the start URL in the toolbar - in this case, the blog homepage - https://www.screamingfrog.co.uk/blog/
Once you click start, the crawl will begin and start gathering your custom data. To view the results of this, you will need to navigate to the custom extraction area of the table. To do this, click on the drop-down arrow displayed next to the table headers and select custom;
Once here, you will see a ‘Filter’ option in the top left-hand corner. Click on the drop-down menu next to this and select extraction.
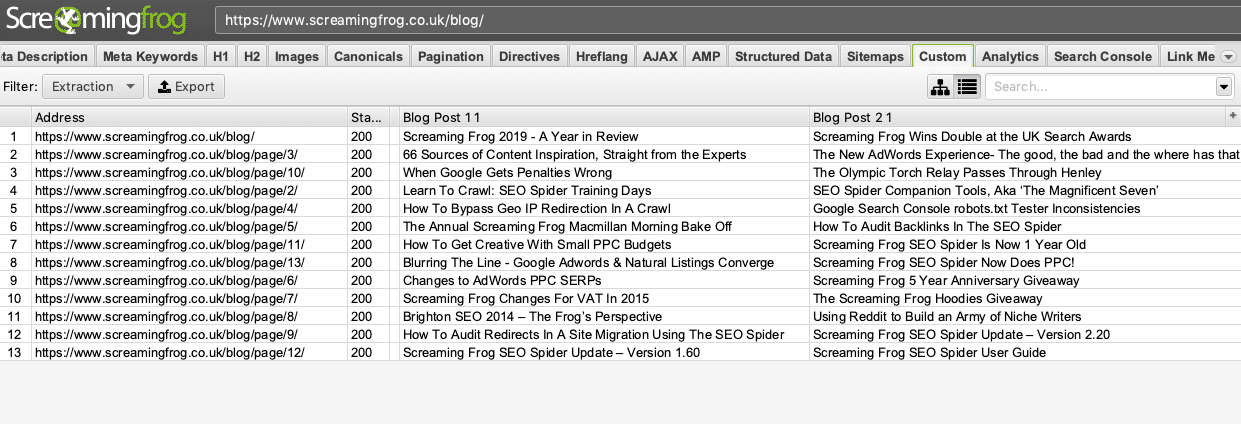
You will now have a table displaying all of the blog titles across the website that you have requested. You can export this as a CSV or scroll through the table within Screaming Frog, depending on what works best for you and what you need to do with the data.
You’re now a data extraction wizard!
So there we have it, a simple example of custom extraction using Screaming Frog. Once you become accustomed to all of the little nooks and crannies of the various settings, you’ll be able to set up crawl in a matter of minutes and set the crawl running.
This can turn a job that would have taken you hours to do manually into a job that takes you 15 minutes, freeing up precious time to analyse your data.